Breaking down or having a part rattle loose is no way to end a ride. Doing a thorough motorcycle pre-ride safety check is an easy way to avoid frustration out on the road. All you need are ten minutes, a tire gauge, maybe some tools, and a dose of diligence. Perform these simple steps before every ride and you’ll be safer and less likely to need your AMA membership’s roadside assistance to get home.
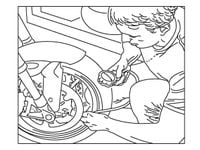
Tire pressure is critical to handling, traction, and wear, since there are only two of them and you won’t be carrying a spare. If you are planning to ride hard or commute to work, inflate your tires to the appropriate level. This will be detailed in your owner’s manual and, if you or the previous owner did not remove it, will be on a sticker on your motorcycle’s frame or swingarm. While you’re down there, check your tires for tread life and any deformities from riding and take a good look at your rims to see if you can spot any damage. Rotate your tires and inspect for nails or punctures.
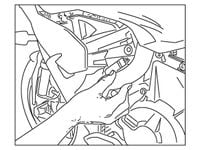
Using your fingers, make sure that your axle, axle pinch bolts, fork pinch bolts, rearset and muffler fasteners, and drain plug are tight. If your bike has fairings or body panels, go ahead and grab them and see if they wiggle too much. Check your handlebar and levers. Take the time now to adjust your clutch lever if you need to, inspecting the cable at the lever down to where it connects to the clutch housing. If you have spoked wheels, now is the time to check if some of the nipples need tightening. If anything is loose, tighten it to spec. If anything is missing, make note of it and order the bolt or part after your ride.
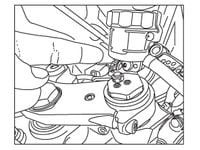
Check your oil level, whether you have an oil sight glass or a dipstick. If you don’t know how to, it will be detailed in your owner’s manual. Cast a glance at your front and rear brake reservoirs to see that they are full and not leaking. Go ahead and depress the levers, noticing the feedback they provide. If anything feels out of the norm, like if there is no feedback from the lever, then stop the inspection and fix the problem. Is your radiator overflow or radiator cap easily accessible? Go ahead and take a look inside. Top it up if you need to. It might need to go without saying, but take a look inside your tank. Check for any debris or rust and if you need to stop for gas before you start your ride.
Just like the rubber of your tires, your bike’s hoses can become brittle and crack, spilling the contents of your bike’s fluid all over the pavement. Take a minute to run your hand along your brake lines and radiator hoses. They should feel smooth and free of any bulges, cracks, or abrasions. Grab your hoses and wiggle them a little to ensure that they are secured tightly at both ends.
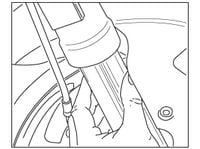
No matter if you have right-side-up or upside-down forks, you should check your stanchions for any damage or pitting. Inspect the stanchions, the smooth part of the fork, for any marring or unnatural bends. Run your finger down the stanchion feeling for any oil. Go ahead and wipe down your fork, cleaning any dust, sand, or road grime off. This will help keep your seals free of any debris, making them last longer.
So, you’re ready to set out on your ride? There’s still one more step to your pre-ride inspection and that’s making sure that all of your lights are functioning. Depress the front brake lever, checking to see if the brake light illuminates. What about the rear brake pedal? Does it light up? What about your turn signals? Do the front and rear blink in unison? What about the headlight? Does it light the road ahead? Could the lens be cleaned up? If everything looks good, then it’s time to thumb the starter and set off.
While it does seem monotonous, this checklist will help you stay on top of your bike and any problems that arise. It will also help keep you on the road and not stranded on the side of it.




/cloudfront-us-east-1.images.arcpublishing.com/octane/IIGGWFOTOJGB7DB6DGBXCCMTDY.jpg)
/cloudfront-us-east-1.images.arcpublishing.com/octane/QSTCM6AVEZA5JJBUXNIQ3DSOF4.jpg)
/cloudfront-us-east-1.images.arcpublishing.com/octane/U4I7G625B5DMLF2DVIJDFZVV6M.jpg)
/cloudfront-us-east-1.images.arcpublishing.com/octane/B6XD6LS6IVCQPIU6HXDJSM3FHY.jpg)
/cloudfront-us-east-1.images.arcpublishing.com/octane/ICL63FEDDRDTTMINYICCEYGMDA.jpg)
/cloudfront-us-east-1.images.arcpublishing.com/octane/FCGZHQXRBZFLBAPC5SDIQLVF4I.jpg)
/cloudfront-us-east-1.images.arcpublishing.com/octane/WNOB6LDOIFFHJKPSVIWDYUGOPM.jpg)

/cloudfront-us-east-1.images.arcpublishing.com/octane/X33NU3E525ECRHXLNUJN2FTRKI.jpg)
/cloudfront-us-east-1.images.arcpublishing.com/octane/6KKT5NNL2JAVBOXMZYS5ZO76YA.jpg)
/cloudfront-us-east-1.images.arcpublishing.com/octane/J5RKG5O455GMPGQRF2OG6LRT7A.jpg)
/cloudfront-us-east-1.images.arcpublishing.com/octane/GX2CIZKQVRH2TATDM26KFG2DAE.jpg)
/cloudfront-us-east-1.images.arcpublishing.com/octane/ZWIDYSAKQZHD5BHREMQILXJCGM.jpg)
/cloudfront-us-east-1.images.arcpublishing.com/octane/CYUHJZCTSJCH3MRAQEIKXK7SCQ.jpg)
/cloudfront-us-east-1.images.arcpublishing.com/octane/LKOFINY56FCXJCANJ5M7ZDQUBY.jpg)
/cloudfront-us-east-1.images.arcpublishing.com/octane/4NBPDACMWJH63JQYJVK3QRBDZI.jpg)
/cloudfront-us-east-1.images.arcpublishing.com/octane/KKHQHRR3FJGX7H2IPU6RALMWG4.jpg)

/cloudfront-us-east-1.images.arcpublishing.com/octane/5IOFS5JAE5FOXMNA23ZRAVVYUU.jpg)
/cloudfront-us-east-1.images.arcpublishing.com/octane/CGXQ3O2VVJF7PGTYR3QICTLDLM.jpg)
/cloudfront-us-east-1.images.arcpublishing.com/octane/OQVCJOABCFC5NBEF2KIGRCV3XA.jpg)
/cloudfront-us-east-1.images.arcpublishing.com/octane/OPVQ7R4EFNCLRDPSQT4FBZCS2A.jpg)
/cloudfront-us-east-1.images.arcpublishing.com/octane/YBPFZBTAS5FJJBKOWC57QGEFDM.jpg)