Modern motorcycle brakes need little in the way of maintenance, save for periodic fluid bleeding and occasional pad inspection or replacement. Changing pads is an easy afternoon job, and if you choose high-spec replacements you’ll even get improved performance for the cheap. If you notice that your pads are looking slim, check them with a ruler or a caliper. Two millimeters of material or less and it means that it’s time to change them out. Here’s how to keep your pads and calipers in top shape.
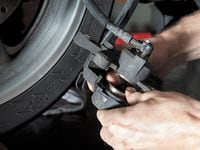
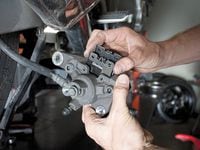
It’s possible to replace your brake pads with the calipers bolted to the forks, but it’s better to remove them so you can closely inspect all of your braking components. Begin by supporting your bike on the center or rear stand. Leave the fork free to turn because it's advantageous to be able to rotate the front wheel for access. Next, with the caliper in place, loosen the pad retention hardware. This includes any retaining pins and clips. Then unbolt the caliper and remove the old brake pads, noting their orientation and the placement of any spring plates or spacers.
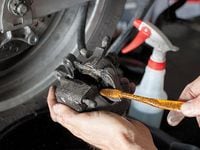
Unless your bike has magically stayed clean through the thousands of miles you’ve ridden, you’ll need to bust out the brake cleaner and a toothbrush. With the pads removed, scrub the exterior of the caliper with a soft-bristle toothbrush and a cleaner—you can always use a mild dish detergent solution. Get all of the gunk off of the pistons and inspect them for rust, pitting, and take note of the state of the seals and if they are due for a replacement. Either dry them off with a towel or allow the calipers to air dry before moving on.
To squeeze your pistons back in, remove the master cylinder—or rear brake cylinder if you’re replacing the rear brake pads—reservoir cap and take note of the fluid level. Carefully press the pistons back into the caliper body using either your fingers or the old brake pad. The reservoir will fill as you press in the pistons, so wick off the excess fluid with a paper towel or draw it off with a syringe so it doesn’t overflow and get all over your bike.
With the caliper still off, dress the rotor with a red Scotch-Brite pad and brake cleaner followed by a clean rag. The idea here is to remove any grime and glazing so the new pads have a clean surface to bed into. Don’t skip this step!
Install the new brake pads—noting the direction marked on the pads—in the caliper then reattach the caliper and torque all fasteners according to the service or owner’s manual. Pump the brake lever and check the brake fluid level. Now would be a great time to bleed your brakes, but otherwise, reinstall the reservoir cap.
Bed your new pads in with several dozen stops from successively higher speeds. To perform the best that they can, your brake rotor has to have a layer of the new brake pad material on it. This will minimize brake squeal and vibration when you slow down and stop. Also, remember that it might be several hundred miles before your new pads are completely mated to the disc.


/cloudfront-us-east-1.images.arcpublishing.com/octane/IIGGWFOTOJGB7DB6DGBXCCMTDY.jpg)
/cloudfront-us-east-1.images.arcpublishing.com/octane/QSTCM6AVEZA5JJBUXNIQ3DSOF4.jpg)
/cloudfront-us-east-1.images.arcpublishing.com/octane/U4I7G625B5DMLF2DVIJDFZVV6M.jpg)
/cloudfront-us-east-1.images.arcpublishing.com/octane/B6XD6LS6IVCQPIU6HXDJSM3FHY.jpg)
/cloudfront-us-east-1.images.arcpublishing.com/octane/ICL63FEDDRDTTMINYICCEYGMDA.jpg)
/cloudfront-us-east-1.images.arcpublishing.com/octane/FCGZHQXRBZFLBAPC5SDIQLVF4I.jpg)
/cloudfront-us-east-1.images.arcpublishing.com/octane/WNOB6LDOIFFHJKPSVIWDYUGOPM.jpg)

/cloudfront-us-east-1.images.arcpublishing.com/octane/X33NU3E525ECRHXLNUJN2FTRKI.jpg)
/cloudfront-us-east-1.images.arcpublishing.com/octane/6KKT5NNL2JAVBOXMZYS5ZO76YA.jpg)
/cloudfront-us-east-1.images.arcpublishing.com/octane/J5RKG5O455GMPGQRF2OG6LRT7A.jpg)
/cloudfront-us-east-1.images.arcpublishing.com/octane/GX2CIZKQVRH2TATDM26KFG2DAE.jpg)
/cloudfront-us-east-1.images.arcpublishing.com/octane/ZWIDYSAKQZHD5BHREMQILXJCGM.jpg)
/cloudfront-us-east-1.images.arcpublishing.com/octane/CYUHJZCTSJCH3MRAQEIKXK7SCQ.jpg)
/cloudfront-us-east-1.images.arcpublishing.com/octane/LKOFINY56FCXJCANJ5M7ZDQUBY.jpg)
/cloudfront-us-east-1.images.arcpublishing.com/octane/4NBPDACMWJH63JQYJVK3QRBDZI.jpg)
/cloudfront-us-east-1.images.arcpublishing.com/octane/KKHQHRR3FJGX7H2IPU6RALMWG4.jpg)

/cloudfront-us-east-1.images.arcpublishing.com/octane/5IOFS5JAE5FOXMNA23ZRAVVYUU.jpg)
/cloudfront-us-east-1.images.arcpublishing.com/octane/CGXQ3O2VVJF7PGTYR3QICTLDLM.jpg)

/cloudfront-us-east-1.images.arcpublishing.com/octane/OQVCJOABCFC5NBEF2KIGRCV3XA.jpg)
/cloudfront-us-east-1.images.arcpublishing.com/octane/OPVQ7R4EFNCLRDPSQT4FBZCS2A.jpg)
/cloudfront-us-east-1.images.arcpublishing.com/octane/YBPFZBTAS5FJJBKOWC57QGEFDM.jpg)