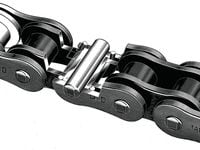
Don’t wait until your chain snaps to replace it. There are several ways to track wear over a chain’s life. The easiest is by grabbing a link on the back of the rear sprocket and pulling it away from the teeth. The farther back you can pull it, the more worn the chain is. Refer to the chain manufacturer, or your bike’s manual, to see how far is too far. As a general rule, half a tooth is the tipping point.
A more accurate method is to put the transmission in gear and turn the rear wheel backward until the top run of the chain is under tension. This compresses the lubricant in the links. Then measure a length of chain a specified number of links long, and check the figure against the factory wear specs. Of course, if the notch on the rear-axle puller is lined up with the last mark on the swingarm, it’s probably game over for the chain. (But be aware that a previous owner might have installed a too-long chain and the only problem is that you’re out of adjustment range; counting the distance between links is always best.)
Chain sizes may seem to be made up by a madman, but are actually just code for the pitch, or pin-to-pin distance, expressed in eighths of an inch, and for the inside width of the chain, again in eighths of an inch. A 530 chain has a pitch of 5⁄8 in. (5), and a width of 3⁄8 in. (3.0). A 525 chain has a 5⁄8 in. pitch and is 2.5 eighths wide, or 5⁄16 in. Depending on the displacement of the bike, the chain will come with a clip-type master link or a rivet-type—some replacement chains come with both. The rivet type is best for large-displacement bikes but requires special tools; it’s less convenient but arguably stronger.
The toughness of a chain is often expressed in terms of tensile strength. But tensile strength is really only one component of a much more important characteristic—fatigue resistance. Good materials and construction contribute to high fatigue resistance. A chain with a higher tensile strength will probably, but not always, have higher fatigue resistance.
Finally, it’s best to replace the chain and sprockets at the same time. They wear in to each other over time, and replacing one and not the other creates a mismatch that results in higher load and faster wear for both components. Yes, we know a lot of owners skip this step, but it’s virtually guaranteed that the second chain won’t last as long as the first. Most chain manufacturers sell kits composed of a chain and sprockets, some of which are offered with several gearing options. Finally, while you’re replacing the rear sprocket, check the wheel bearings and hub dampers, and replace those if needed.

/cloudfront-us-east-1.images.arcpublishing.com/octane/IN263JIBTBCD3O265IMSCW6OZM.jpg)
/cloudfront-us-east-1.images.arcpublishing.com/octane/SMAQ354X2JH7NJATXNSQY4NRS4.jpg)
/cloudfront-us-east-1.images.arcpublishing.com/octane/GGOH2AQRSVHY5C5JLNEVYLB5SU.jpg)
/cloudfront-us-east-1.images.arcpublishing.com/octane/TJJEHV3ATZFFXHUYZABHXKE2DI.jpg)
/cloudfront-us-east-1.images.arcpublishing.com/octane/WIC4RXQ36BAXNIW6U4UJ3XDLKI.jpg)
/cloudfront-us-east-1.images.arcpublishing.com/octane/B4PQZLY4LBHITGE5ZRRM2N5YNU.jpg)
/cloudfront-us-east-1.images.arcpublishing.com/octane/OBYS7KWZUJFCHD44YPTSVM5EF4.jpg)
/cloudfront-us-east-1.images.arcpublishing.com/octane/FY7ZXYBT4NH2NGYQIWQVITS4AM.jpg)
/cloudfront-us-east-1.images.arcpublishing.com/octane/JPET6WQUDZEYLNXVY5LRNDRPLA.jpg)
/cloudfront-us-east-1.images.arcpublishing.com/octane/EY6P2QIFQJCDTNOMR3JB7WJED4.jpg)
/cloudfront-us-east-1.images.arcpublishing.com/octane/V2U6JB7KXNCQRN4OW6HNJTVMZQ.jpg)
/cloudfront-us-east-1.images.arcpublishing.com/octane/AMS43BT5ABH77NY7XKLCSZCNM4.jpg)
/cloudfront-us-east-1.images.arcpublishing.com/octane/NTK2ASYKUBDW5MQDWQLVQYOELY.jpg)
/cloudfront-us-east-1.images.arcpublishing.com/octane/SX7R3KCIANGDBGF45O73F543TM.jpg)
/cloudfront-us-east-1.images.arcpublishing.com/octane/ZTW4V7RAPFG6RFWJRXR2IX5ZQ4.jpg)
/cloudfront-us-east-1.images.arcpublishing.com/octane/EPRSLPIUTBC5RPD7R263BPV2D4.jpg)
/cloudfront-us-east-1.images.arcpublishing.com/octane/EMJ4I2T4HVCRVJPZ3UJFVMRDHA.jpg)
/cloudfront-us-east-1.images.arcpublishing.com/octane/CBDAM3VMJNFDBLE7Y3FY7RD5BY.jpg)
/cloudfront-us-east-1.images.arcpublishing.com/octane/CCEB3TNMU5FH3OZ4FKJ7DA2LBA.jpg)
/cloudfront-us-east-1.images.arcpublishing.com/octane/VV6N3KUWEVFJJD7F7VX6ICOH7Q.jpg)
/cloudfront-us-east-1.images.arcpublishing.com/octane/R55SVEXZ5VA2LCWFWYR647ASX4.jpg)
/cloudfront-us-east-1.images.arcpublishing.com/octane/MYWIEFOQ6JCCNDR4OBF5PU5LVE.jpg)
/cloudfront-us-east-1.images.arcpublishing.com/octane/OOZ3C4GCUJGRNONDI6DHVM57GI.jpg)
/cloudfront-us-east-1.images.arcpublishing.com/octane/JEKB3CMWXZD6ZAVFEDKLOQ5FNY.jpg)