WRIST: Brian Hatano
MSRP (2015): $11,299
MILES: 6,487
MPG: 40 mpg
MODS: Rizoma Club Indicator Lights and Adaptors (clamps)
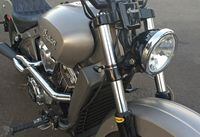
Every time I stop to admire the Scout , the first thing that my eyes seem to focus on are the turn signal lights. Like big ears, they're just sticking out for all to see. There's nothing special about the styling of the lamps; no integration with the lines of the fenders or framework. Just plain old cruiser lights. And they're not much different than the lights on my 18-year-old Harley-Davidson Softail Springer. The new Scout certainly deserves better.
Maximum illumination from the smallest possible lamp is what a lot of us strive for whenever we upgrade a light assembly, and there are literally dozens of Harley-specific kits that relocate the front signals to the mirror, the handlebar end, or to a less conspicuous location on the fork. Scout owners, however, are going to have to be a little more creative with some universal-fit lighting products. While it might require some old fashioned researching and measuring for each component, the one big benefit is that you’ll end up with a unique modification. At least until someone sees and copies it of course.
For those of you Scout owners who are following along with my long-term mods this month and are contemplating a turn signal swap, you’re in luck. I’m going to take some of the guesswork out of the process and put a front turn signal kit together that not only eliminates the big factory light assembly, but also installs easily in the same location on the fork tube.
The factory Scout front turn signals attach to a 1 5/8-inch fork tube via flexible rubber clamps. These lamps are practical, low-cost incandescent units that are durable and work well. Unfortunately, the molded configuration of this setup doesn’t allow a quick and easy lamp-only swap. The whole unit has to go and this is where you have to get creative.
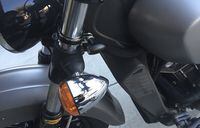
So I headed straight for the Rizoma website ( rizoma.com ) to scope out some of their latest LED lamp designs and I was keeping my fingers crossed that I'd find some fork clamps in their universal products section. One of their new mini lamps called the Club was exactly what I had in mind; a small black-anodized, bullet-shaped light that looked kind of retro yet modern. A perfect upgrade, though not cheap at $72 each.
The Rizoma universal fork clamp ($93 each) will accommodate 39mm, 41mm and 43mm fork tubes. The Scout’s 1 5/8-inch tubes measure out at 41 and change so I decided to chance it and placed the order.
If you’re familiar with Rizoma products you know that everything in their catalog is like jewelry for motorcycles. Even the packaging would seem at home conveying a fine watch. Each Rizoma Club light comes ready to mount with bullet connectors pre-installed on the wiring. Two load resistors are included with each light and the wattage of the bulb being replaced will determine whether you use one or both. The factory Scout turn signal bulb is rated at 10 watts and, according to the Rizoma wiring diagram, requires only one load resistor.
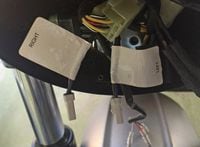
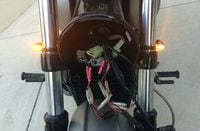
The Scout’s front turn signals are connected to the system inside the headlight housing. Once you remove the headlight, you can trace each light to a small white plug that is clearly labeled “left” and “right.” I recommend working on one side at a time to avoid the possibility of getting any wires crossed. Once you clip the plug for the turn signal, you’ll have two color-coded 20-gauge wires: black/pink, which connects to the Rizoma red wire from the load resistor, and a blue/red that connects to the Rizoma black wire from the load resistor.
Since the wire connections are easily accessed in the headlight housing, I chose to go with butt connectors (pink/red for 20-gauge wires). You can solder the connections if it’ll give you peace of mind but as long as the wiring is easily accessible and there are no space limitations, a proper crimp will suffice. With the Rizoma jewels in place and the big OEM Indian lamps out of the picture, I can now look at the Scout without distraction. And, the flashing lights are actually brighter than before. The rear indicators will match the fronts, of course, but the installation is a much simpler fender mount which you’ll see in the final update.


/cloudfront-us-east-1.images.arcpublishing.com/octane/JRSFLB2645FVNOQAZCKC5LNJY4.jpg)
/cloudfront-us-east-1.images.arcpublishing.com/octane/ITNLTIU5QZARHO733XP4EBTNVE.jpg)
/cloudfront-us-east-1.images.arcpublishing.com/octane/VZZXJQ6U3FESFPZCBVXKFSUG4A.jpg)
/cloudfront-us-east-1.images.arcpublishing.com/octane/QCZEPHQAMRHZPLHTDJBIJVWL3M.jpg)
/cloudfront-us-east-1.images.arcpublishing.com/octane/HXOUJXQWA5HBHGRO3EMJIGFMVI.jpg)

/cloudfront-us-east-1.images.arcpublishing.com/octane/3TIWWRV4JBBOLDVGRYECVVTA7Y.jpg)
/cloudfront-us-east-1.images.arcpublishing.com/octane/KIX5O23D5NAIBGFXBN3327DKZU.jpg)
/cloudfront-us-east-1.images.arcpublishing.com/octane/7GJYDUIPXRGMTMQKN6ONYOLBOU.jpg)
/cloudfront-us-east-1.images.arcpublishing.com/octane/MUQLOVLL2ZDGFH25ILABNBXKTI.jpg)
/cloudfront-us-east-1.images.arcpublishing.com/octane/TNOU5DNE2BC57MFPMGN2EIDXAM.jpg)
/cloudfront-us-east-1.images.arcpublishing.com/octane/GTCXACQGJ5HAPDTGWUQKDEH44E.jpg)
/cloudfront-us-east-1.images.arcpublishing.com/octane/S35YGSEMEZB4BLTDJTSZPF4GLA.jpg)
/cloudfront-us-east-1.images.arcpublishing.com/octane/5UOT6HPX2JFMRJAX6EH45AR4MQ.jpg)
/cloudfront-us-east-1.images.arcpublishing.com/octane/OKWOJWAKP5EP3OACCRRWPCIX2Q.jpg)
/cloudfront-us-east-1.images.arcpublishing.com/octane/2WF3SCE3NFBQXLDNJM7KMXA45E.jpg)
/cloudfront-us-east-1.images.arcpublishing.com/octane/G4MG6OUCJNBSHIS2MVVOTPX65E.jpg)
/cloudfront-us-east-1.images.arcpublishing.com/octane/IIGGWFOTOJGB7DB6DGBXCCMTDY.jpg)
/cloudfront-us-east-1.images.arcpublishing.com/octane/QSTCM6AVEZA5JJBUXNIQ3DSOF4.jpg)
/cloudfront-us-east-1.images.arcpublishing.com/octane/U4I7G625B5DMLF2DVIJDFZVV6M.jpg)
/cloudfront-us-east-1.images.arcpublishing.com/octane/B6XD6LS6IVCQPIU6HXDJSM3FHY.jpg)
/cloudfront-us-east-1.images.arcpublishing.com/octane/ICL63FEDDRDTTMINYICCEYGMDA.jpg)
/cloudfront-us-east-1.images.arcpublishing.com/octane/FCGZHQXRBZFLBAPC5SDIQLVF4I.jpg)
/cloudfront-us-east-1.images.arcpublishing.com/octane/WNOB6LDOIFFHJKPSVIWDYUGOPM.jpg)