How does that saying go? Oh, yes: Bring an umbrella and it'll never rain. In the grand scheme of road-trip checks and balances, the likelihood of getting a flat tire seems directly proportional to the quality of your flat kit and the walking distance to the nearest help. (And let's not forget that the odds go way up when you're out of cell-phone range.)
Travel enough and you're going to get a flat. Assuming you can effect a repair by the side of the road, the next question is, er, what's next? Depends. If the tire is close to worn out, you've just given yourself the perfect reason to buy a new one. Find the nearest motorcycle dealer or independent shop, be especially nice to the service people and you'll be out of there in a couple of hours. Don't worry about matching tires front to rear, but stick to the original size and category of tire; that is, don't substitute a touring-oriented bias-ply for a race-spec radial. That said, many riders successfully run two different tire brands, and even more mix and match models from the same manufacturer --such as a soft sport tire for the front and a more durable sport-touring tire for the rear.
But if your tire is nearly new, you have a decision to make, understanding that the roadside fix is purely temporary. If you don't want to buy a new tire, have the shop install a permanent plug--one that installs from the inside of the tire. Be prepared to be talked out of it, however; many shops refuse to install tire plugs for liability reasons, and many shops refuse to do it for economic reasons. You may have to call around to find someone who will make the repair; typically, a small independent shop will be more likely to undertake the job than a multiline mega-dealer. As an alternative, you might consider asking the shop to remove the tire from the wheel and let you do the repair, though that might make the service writer even more squeamish.
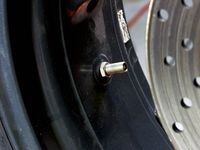
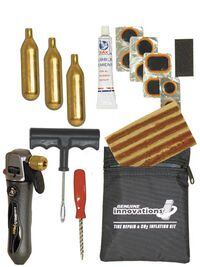
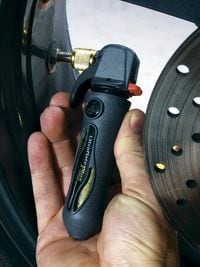
In any case, hauling a good flat-repair kit works as preventive medicine, and we recommend adding a few items to the supplies. Pack a valve-stem remover and a spare stem, a thin rag or a sealed packet of premoistened towelettes, a razor blade or a box cutter, a tire-pressure gauge and extra CO2 cartridges for the system you're using. Hint: Sporting-goods stores (and the odd Wal-Mart) carry popular cartridges for a lot less than refills from the kit manufacturer. Find a convenient place for the flat kit (that is, try not to bury it under layers of cargo), inspect it before each long trip (opened rubber cement has a tendency to dry out), and know how to use it. Now you can go back to enjoying your motovacation.
How To Get It Done
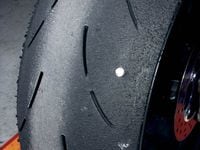
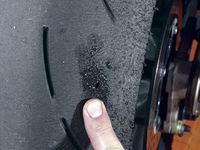
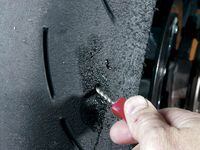
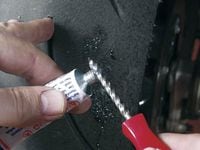
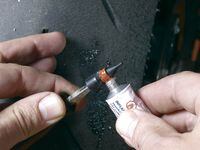
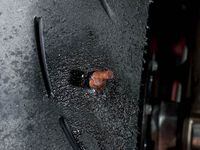
Motorcyclists who pack flat-repair kits often look at them the same way air-show pilots consider the parachute: It behooves you to learn how to use it even as you do whatever you can to avoid having to use it. In fact, it makes good sense to practice with your flat kit--on a soon-to-be-discarded tire, of course--before you need to do it "for real." As in: On the side of the road, rain falling sideways, homicidal truckers tickling your handlebar tassels.
Good thing most flat kits are easy to use. Follow along, won't you?
The Four Reasons You Got A Flat
1. It's raining. Yup, according to Avon tire engineers, you're more likely to pick up a puncture in wet weather because debris comes prelubricated. Dry objects have a harder time piercing the tread, so though you may have run over a roofing nail in the dry, it's not as likely to burrow into your shiny new tire.
2. You opted for the super-sporty tires this time around. To prevent excessive heat and improve the shape of the contact patch, high-performance (also known as sport or supersport) tires have less rubber on the tread and are therefore more vulnerable.
3. Just this once you didn't bring the flat kit.
4. You just bought that tire. See number 3 above. Karma works in mysterious ways.
Checklist: Tools & Bike supplies
On a long tour these are the basics that are called upon again and again. We keep the listed items--along with snacks and seasonal sundries--in a tail pack fondly called "The Magic Bag."
•Allen wrench set
•Box wrenches
•Bulbs
•Chain lube
•Cotter pins
•Crescent wrench
•Duct tape
•Flashlight
•Four to six feet of baling wire
•Impact driver
•Jumper cables
•Master link
•Nuts and bolts
•Pipe as extension and stand
•Pocket screwdriver
•Ratchet and appropriate sockets
•Six feet of electrical wire
•Small container of oil
•Small locking pliers
•Spare fuses
•Spark plugs
•Tire repair kit(s) with inflator
•Tire sealant
•Tow strap
•Waterless hand cleaner
•Wire cutters
This list should be tailored to your bike and requirements, but it has been refined by a lot of experience, mostly the kind where you wish you'd brought something but didn't.






/cloudfront-us-east-1.images.arcpublishing.com/octane/VZZXJQ6U3FESFPZCBVXKFSUG4A.jpg)
/cloudfront-us-east-1.images.arcpublishing.com/octane/QCZEPHQAMRHZPLHTDJBIJVWL3M.jpg)
/cloudfront-us-east-1.images.arcpublishing.com/octane/HXOUJXQWA5HBHGRO3EMJIGFMVI.jpg)

/cloudfront-us-east-1.images.arcpublishing.com/octane/3TIWWRV4JBBOLDVGRYECVVTA7Y.jpg)
/cloudfront-us-east-1.images.arcpublishing.com/octane/KIX5O23D5NAIBGFXBN3327DKZU.jpg)
/cloudfront-us-east-1.images.arcpublishing.com/octane/7GJYDUIPXRGMTMQKN6ONYOLBOU.jpg)
/cloudfront-us-east-1.images.arcpublishing.com/octane/MUQLOVLL2ZDGFH25ILABNBXKTI.jpg)
/cloudfront-us-east-1.images.arcpublishing.com/octane/TNOU5DNE2BC57MFPMGN2EIDXAM.jpg)
/cloudfront-us-east-1.images.arcpublishing.com/octane/GTCXACQGJ5HAPDTGWUQKDEH44E.jpg)
/cloudfront-us-east-1.images.arcpublishing.com/octane/S35YGSEMEZB4BLTDJTSZPF4GLA.jpg)
/cloudfront-us-east-1.images.arcpublishing.com/octane/5UOT6HPX2JFMRJAX6EH45AR4MQ.jpg)
/cloudfront-us-east-1.images.arcpublishing.com/octane/OKWOJWAKP5EP3OACCRRWPCIX2Q.jpg)
/cloudfront-us-east-1.images.arcpublishing.com/octane/2WF3SCE3NFBQXLDNJM7KMXA45E.jpg)
/cloudfront-us-east-1.images.arcpublishing.com/octane/G4MG6OUCJNBSHIS2MVVOTPX65E.jpg)
/cloudfront-us-east-1.images.arcpublishing.com/octane/IIGGWFOTOJGB7DB6DGBXCCMTDY.jpg)
/cloudfront-us-east-1.images.arcpublishing.com/octane/QSTCM6AVEZA5JJBUXNIQ3DSOF4.jpg)
/cloudfront-us-east-1.images.arcpublishing.com/octane/U4I7G625B5DMLF2DVIJDFZVV6M.jpg)
/cloudfront-us-east-1.images.arcpublishing.com/octane/B6XD6LS6IVCQPIU6HXDJSM3FHY.jpg)
/cloudfront-us-east-1.images.arcpublishing.com/octane/ICL63FEDDRDTTMINYICCEYGMDA.jpg)
/cloudfront-us-east-1.images.arcpublishing.com/octane/FCGZHQXRBZFLBAPC5SDIQLVF4I.jpg)
/cloudfront-us-east-1.images.arcpublishing.com/octane/WNOB6LDOIFFHJKPSVIWDYUGOPM.jpg)

/cloudfront-us-east-1.images.arcpublishing.com/octane/X33NU3E525ECRHXLNUJN2FTRKI.jpg)